This recipe came to me from a friend (thanks Kayla!) via facebook and it sounded so tasty and easy I wanted to make it right away, as well as take a crack at blogging about cooking WHILE taking food photos. (You’ll find my photo comments, mixed in with my recipe notes, about using my Nikon D5000 for this food blogging exercise.)
And, after posting this entry, I bow down even MORE to Ree Drummond, the Pioneer Woman. Does she really cook AND take those amazing photos by herself? She makes blogging, cooking AND shutterbugging look so easy…but, it isn’t!!
CHICKEN ENCHILADA CASSEROLE
Ingredients
1 lb. chicken breast cut into bite size pieces (option: use store-bought rotisserie chicken)
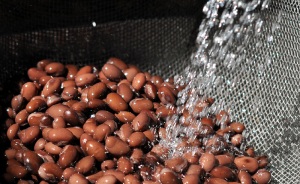
2 cans black beans (rinsed)
2-3 cups grated jack or cheddar cheese (or mix both)
28 oz. can green chile enchilada sauce (or red enchilada sauce)
1 pkg. medium size flour tortillas
1 can sliced olives
1 bunch green onions
I usually BBQ the chicken breasts and season with garlic salt and pepper. I have also grilled on the stove top with a little olive oil and garlic salt/pepper. After chicken is cut into pieces, marinate in half of the green chile enchilada sauce.
[RECIPE NOTE: I used the breasts from a store-bought rotisserie chicken and I used the MILD red enchilada sauce since Nora (4 1/2 years old) does not like spicy food. The store only had the MEDIUM green enchilada sauce in stock.]
[PHOTO COMMENT: To capture the action of the spraying water I used the “sport” SCENE setting here.]
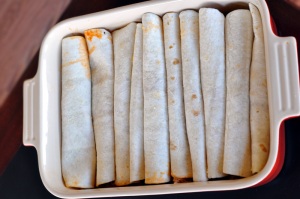
Fill each tortilla with marinated chicken, black beans and cheese. Wrap tightly and tuck to secure.
[RECIPE NOTE: I filled each tortilla with about 3 heaping Tbsps. chicken, 2 heaping Tbsps. black beans, and a small handful of cheese]
I can usually fit 6-8 enchiladas in a 9X13 glass pan (no need to grease).
[RECIPE NOTE: I was able to fill 11 tortillas using a larger casserole dish]
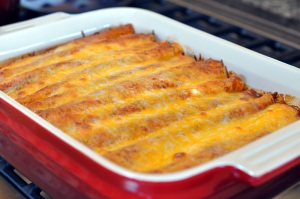
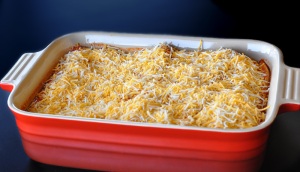
Spoon the remainder of the sauce over the top of the enchiladas and then sprinkle on the rest of the cheese. Garnish with olives and green onion.
[RECIPE NOTE: I omitted the olives and green onions, again to appease “the kid”!]
Bake at 350 degrees for approx. 30 minutes.
Serve with sour cream and Mexican rice.
[RECIPE NOTE: We also served it with sliced avocado and salsa. YUM!!]
MEXICAN RICE
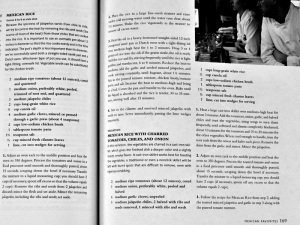
I like this recipe for Mexican Rice from my 2005 America’s Test Kitchen cookbook.
If you enlarge this image you should be able to read this recipe.
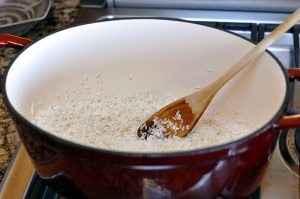
[PHOTO COMMENT: There’s nothing really remarkable about this rice photo aside from HOW I caught the shot. More about this later…]
[RECIPE NOTE: This recipe calls for 2 ripe tomatoes pureed with a medium white onion. I used a can of diced tomatoes instead, which I drained quickly. It also asks you to use exactly 2 cups of the puree. Because I used a large onion I ended up with a bit more than 2 cups of the puree. The texture of the rice was just fine but, there was a stronger onion flavor, which I liked but, surprise, surprise, it was a bit strong for my daughter.]
What I learned about food blogging…
It’s HARD but, doable. I hope some of these tips and learning from my mistakes will make it easier for you!
- Scan the counters or the background of any of your photos ahead of time. You want to remove anything that could distract from your photos. This may mean having to CLEAN your kitchen! Yikes!
- Prepping all of the ingredients ahead of time is KEY to executing both cooking AND photographing.
- Taking step-by-step photos can be an exercise in speed, coordination and balance.
- There were times when I had to protect my camera and lens from splattering oil, splashing water and greasy hands. Quick access to baby wipes or a fast way to clean your hands would be handy. Washing my hands with soap and water in the sink took too much time to capture some shots.
- I used my Nikon 50mm f1.4 lens. I think this was a good choice although, at times I wished I had my spare Olympus camera equipped with the macro prime lens at hand. Next time…
- I used the “food” setting on my D5000 (ISO settings from 800 -1600, F-stop 4, Exposure: 1/60). Although these photos were mostly sharp, I wish I had more bokeh.
- For the shots I took away from the stove, I placed the food on my kitchen nook table next to north facing windows. I took the photos with my back facing the windows after getting too much glare taking photos from the opposite direction.
- My kitchen gets a lot of natural light so I was able to take these photos without a flash, which is desirable.
- At 5 feet and some change I often need to take photos on a chair (or even a ladder.) To take the rice photo I used the LiveView feature and tilted monitor of my D5000 for the first time. I was able to raise the camera, turn LiveView on, tilt the monitor down, and take the photo from the angle I wanted. Most DSLR cameras only let you take photos using the viewfinder so seeing the photo on the monitor while setting up the shot is huge! I love LiveView!!
- My last point is just a basic reminder: confirm that you have saved all of your photos BEFORE you delete your photos on your camera. I took some beautiful shots of the enchiladas and rice plated on a contrasting deep blue pottery plate. You’ll just have to take my word for it that the photos were beautiful enough to make you drool. 🙂
So, how long did this exercise take me??
The more you care about attention to detail, the longer it will take you. TRANSLATION: If you’re anal like me, it will take you longer than necessary!
- Prep (30 minutes): cleaning and clearing kitchen surfaces, taking test shots, setting up initial camera settings.
- Cooking and photographing (1 hour): Prepping ingredients and cooking while photographing step-by-step.
- Post-processing of photos (30 minutes): Selecting photos, adjusting and correcting them, resizing and compressing for the web.
- Blogging (2 hours): Incorporating the recipe with the step-by-step photos, recipe notes and photo comments. Editing and re-editing. Why so long? Partly because this is new to me and partly because using the WordPress editor is sometimes cumbersome.
- TOTAL: 4 hours
Will I do this again?
Probably, because I like the challenge of blogging and taking photos, and, because I get to somewhat draw on my old skills as a technical writer for software manuals (yup, NERD ALERT!), but, not often. It’s a lot of work!
Again, hats off to Ree Drummond, the Pioneer Woman and to all of you talented bloggers out there!





These mexican rice are just WoW!!!!!!!!!!!!
i like it and like your blog keep it up
LikeLike
Great pictures! I just take pictures right before I serve up dinner. I can’t be bothered to take up more time than that. My son keeps asking me why I keep taking pictures of everything I cook. It’s going to be helpful for when I make a cookbook for the kids to use. Blogging forces me to write down the recipes for them.
LikeLike
Just wondering if you have ever made the enchilada casserole earlier in the day, except for the cooking step? I was thinking of doing this, refrigerating it and cooking it right before dinner time. Your thoughts. Thanks
LikeLike
yes, make everything ahead of time. you can even freeze it and bake later. just bake a little longer. from the fridge bake it covered for 20 min then bake another 10-15 min uncovered until cheese is bubbly and a little browned. let me know how it turns out!
LikeLike
Looks fab. Planning on making it later this week, but with rice tortillas, to make this dish gluten free. Thanks for sharing. Yes, food photography adds an interesting dimension to preparing meals. 😉
LikeLike
please share how that turns out. and, i have posted some gluten-free recipes, like my gluten-free lemon tart using an almond crust with coconut flour. thanks for stopping by my blog and please check out our new http://thejuicymamas.com blog where i re-blogged your french strawberry cake post. 🙂
LikeLike
Thanks for the reblog. Really appreciate it. We did check out your recipes and love them.
LikeLike